Taking photographs for a party - low light photography
I'm sometimes asked to cover a Christmas or birthday party and was thinking I might share few tips to other photographers out there. These tips are valid for any kind of indoors party where the light level is low.
I will try to show you how to take good shots keeping the existing ambient light in the photographs and how to create your own ambient when the party venue is dull.
I will be covering mostly off-camera flash technique and how to maintain sharpness and ambient light.
Being a photographer, you will, one day or another, be asked to cover weddings, birthdays and other parties. But you will soon discover that it could be hard to get really interesting pictures with basic equipments.
Tip #1 - Go Manual:
If this is the first time you ever cover an indoor event and you are using you camera's popup flash, you will notice that your foreground subjects will either be over exposed or well exposed, but then all the background is going pitch black. Thinking it might be because the popup flash is too weak, you decide to use an external hotshoe flashgun just to discover that the result is exactly the same... Buying the gears is not enough. You need to know the tricks and most importantly, not let the camera decide for you: go Manual!
Even with on-camera flash, going in Manual mode on your camera will improve your image. In Auto or Aperture Priority, you will notice that when you have a flash on, your shutter speed is going to be not slow enough, usually 1/60 sec by default on Nikon cameras. This is because the camera wants to help you get a sharp image, and because you have a flash it thinks that 1/60th should be enough. While this is true, your images will be sharp, the problem is the ambient light. Even with a fast lens at f/2.8 and ISO 400 a shutter speed of 1/60 is not enough to get a good exposure of the ambient. But most of the time because you will be photographing more than one person at once, you will want a smaller aperture in order to get a wider depth of field. And by going let say to f/5.6 you are under exposing more than 2 stops which means you have 4 times less light! So unless you own a Nikon D3 and boost your ISO to ISO 3200 or more, you will either get a black and uninteresting background or a noisy one.
On my Nikon D300 I'm usually using an ISO between 400 and 1000, depending on how bright is the background. Then I switch my camera to Manual mode, have my aperture to f/2.8 (for group shots I would try to get everyone at the same distance from my camera, or will change the aperture if needed). Then I would take some test shots until my background looks good and would under expose it a little bit. With my favorite 35mm f/1.8, at f/2.8, ISO 800, I would usually get a shutter speed of 1/20 sec. It's not an ideal shutter speed but if you concentrate, then the shot should be decently sharp.
Now with the help of a flash, my foreground subjects will be pin sharp even at 1/20 sec or decently slower and my backgrounds are not dull anymore. Depending on how the background will look like, I wil fine tune my shutter speed and also up my ISO if I cannot go slower without having a movement blur or down the ISO if there are plenty of light and I want better image quality.
Tip #2 - Go off-camera flash:
Having a fast lens and mastering your shutter speed can be enough to get more interesting pictures. But you will notice that the pictures don't always look natural: shiny foreheads, dark shadows under the nose, flat looking faces... This is because the flash is coming straight in front of your subject. How many times have you ever talked with somebody wearing a head lamp? So why on earth would you want to try getting natural looking pictures with on-camera flash?
I must admit holding the camera in one hand and a flash in the other hand is not very practical. And you might not want to cary a light stand around the party venue. In that case the least you can do is bounce off a wall or a ceiling!
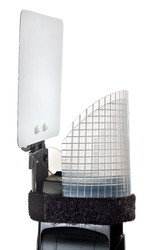
While bouncing from ceilings/walls it is good to use a flash diffuser such as a Sto-Fen flash diffuser, a Gary Fong Light Sphere or Whale Tail, A Better Bounce Card, or one of my new acquisition: a Demb Flash Diffuser (pictured on the left). These diffusers will not only allow your flash to bounce off the ceiling or walls, but they will also send part of the light towards the front and sides. This will allow the flash to self fill the shadows casted on the subjects.
But if you can, then I definitely recommend you to use off-camera flash, either by using a clamp to attach a flash gun to a pole, a door or any other furniture around the venue. Or get your light on a light stand. If the venue is not too large, a good trick is to have one flash on a light stand at two opposite corners either pointing to the ceiling to soften the light in small rooms, or pointing towards the center of the room for larger ones. I regularly use this technique along with using my Nikon SB-900 on-camera as a master and fill-in flash. The two remote will acts differently depending on which direction I am pointing my camera at: two rim lights or one key light and one rim light.
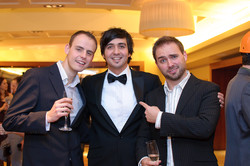
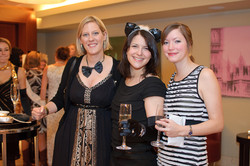
Here are some example of shots taken with the Demb Flash Diffuser:
Tip #3 - Create your ambiance
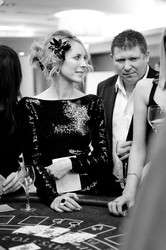
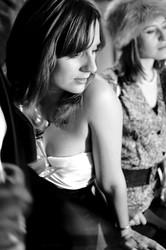
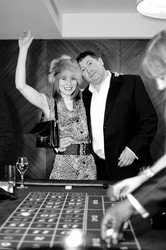
In some situation you might not be able to use flash or the ambient light is not great but you cannot do anything for it. Have you thought of black and white? It might work well, but don't make it an excuse to shoot all black and white... Last year, my company have organized a Christmas Party around the theme of James Bond and there was a casino where you could play Black Jack and Roulette. The combination of James Bond and Casino is ideal for black and white shots with a flash to fill in a bit:
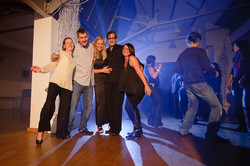
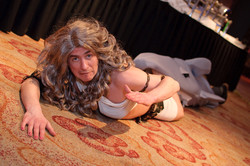
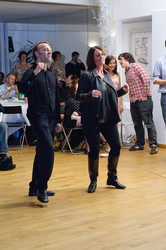
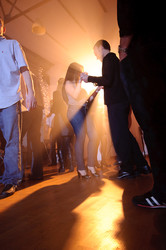
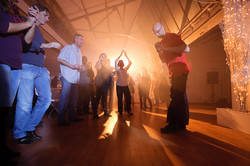
In other situations black and white is not ideal. Such as the 40th birthday party of Toby, my mate's friend. The venue where the party was held at was just lit with regular light bulb which would have made the shots looks just boring (see image on the left). After all the singing from the groups, all attendees were dancing. But the lighting wasn't really exciting. Fortunately for me I was allowed to use tripods and clamps! So my favorite trick here is cross lighting and color gels!
Let start with the color gels. They are piece of colored plastic films that will turn your white flash light into colored light. For a party and even for gigs or band rehearsal, I like to use color gels to create an non existing ambiance. My favorite colors are blue and orange. They create a very strong and interesting color contrast. I would use two blue gel on one flash and a full CTO (orange) + 1/4 CTO on the other flash. Using two blue gels will create a deeper blue light. I will then set my camera to Tungsten white balance which will make the blue color even bluer! The Tungsten (or bulb) white balance will then balance the light going through the first full CTO gel back to white, that's why I'm using a second 1/4 CTO gel to re-warm up that light slightly. And if I want a much warmer color from the CTO gelled flash, I just need to reset my white balance to daylight.
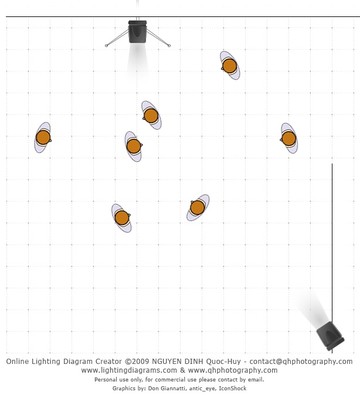
I would position the light at opposite directions. In Toby's birthday case, I've set the CTO gelled flash on a lightstand against the wall at the back. The blue gelled flash is clamped to a railing at the opposite side of the room slightly on the right. I can't use another lightstand here because of the partiers and I did not bring a second stand anyway... (travel light!).
Here is a lighting diagram created with the Online Lighting Diagram Creator:
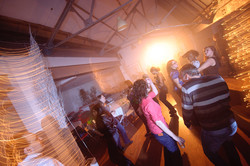
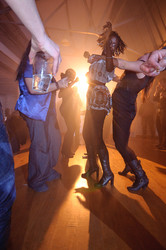
And some result shots:
Much better than the available light isn't it? But thinking again, my flashguns were in my bag with me, and they were available for me to use... So they are my own available light!
I hope this post will help you. If you have any questions, please drop them in the comments.
Tweet


Comments
Shots without flash guns
Wednesday 21 April 2010 3:20:50 pm
Commented by Zim
Low Light
Friday 30 April 2010 4:32:04 pm
Commented by Wayne
>http://www.prankardphotography.com
Thank you
Saturday 01 May 2010 2:10:40 am
Commented by
Tuesday 11 May 2010 5:41:32 am
Commented by
appreciation
Tuesday 03 August 2010 8:37:59 am
Commented by Mike Hunter
Great tutorial
Thursday 12 August 2010 5:20:37 am
Commented by Kimmy