Using a grid spot to restrict the light
Learning to light your pictures with flashguns is a great skill to have. These very portable light sources are very handy and put in a camera bag they become available light. Whenever you lack of light or the natural light needs some complement, just take your speedlight and make the magic happens.
One of the most important thing in taking photographs with flash is not only what you are lighting but mostly what you are not.
We often need to separate our subject from the background, make it stands out from distracting elements in the scene. For photographers using only natural light, there is the depth of field (DOF) that allows the isolation of the subject from the background scene by creating a blurr also called bokeh. This can be achieve by using a lens that has a wide aperture (smallest aperture value) like f/2.8, f/1.8 etc... the wider the aperture, the more blurr you can create without going too close to the subject. But for photographers using flash in their work, very often they need to use a small aperture when shooting outdoors due to the fact that the use of flash restrict your shutter speed to a max value of 250th sec (can be different depending on the camera). The brigthness of the ambiance and this max shutter speed make you need to close the aperture to expose the ambiance properly and thus loose the bokeh. So how can you make the subject stands out?
What is interesting when using flash in your work is the fact that the flash delivers a burst of light that is very fast and your camera in order to sync with the burst of light cannot be faster than 1/250 sec, except with recent flashguns allowing the FP (Focal Plane) mode but you are loosing flash power. Being limited to 1/250 sec for the shutter speed means that you can change your shutter speed, by slowing it down only, without affecting the exposure for the flash. That exposure is affected only if you change the aperture or if the ambiance level is high enough and adds to the flash exposure. This means that once you get your subject (lit by the flash) well exposed, you can change your shutter speed to change just the exposure of the ambiance lit scene (background). So if you are outdoors in the afternoon, you can take a picture that looks it has been taken in the evening by choosing a low ISO, the fastest shutter speed allowed with a flash (1/250 sec) and a small aperture. In the shade or indoors, you could also bring back the ambiance by slowing down the shutter speed. Or you can even completely kill the ambiance into a pitch black background.
See the following test shot:
It has been taken in aperture priority with a cream duvet as background. Even though it has been shot at f/8 the background is blurred because of the macro lens. But for a bigger object and using a normal lens the background would be more defined. Taken under a tungsten bulb, both subject and background are lit.
Now if I switch to Manual on the camera keeping f/8 and a shutter speed of 1/250 sec, the picture would be completely black. So I'm going to add a flash gun close to the subject:
As you can see, the background is now much darker. If I was using a tripod, I could then slow down my shutter speed to something like 1/20 sec or even slower and bring back the ambiance on my background, then I can even make the background brighter by slowing down even more or make it darker by speeding up until I get the level I want for my picture. I can control how much separation I want for my subject to stands out from the background. In this picture, you can notice that the lower right part of the duvet still shows a bit in the picture. From a test shot I know that at 1/250 sec @f/8 ISO200 my picture is completely black. So how comes I get the duvet in the picture? This is due to a little amount of flash light was spilling to the background. I can solve this by bringing my flash closer so that it falls off faster. But I cannot always do that. So my answer to this issue is to use a snoot or a grid spot.
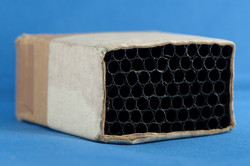
A snoot is just an object that wraps around my flash head making a tunnel that directs the flash light into a tight beam of light going just where I want it to go. A grid spot is similar to a snoot but much shorter with the inside of the tunnel made of a grid. A grid spot is easily made DIY way. You just need some cardboard and black straws (see picture at the top). A grid spot gives you even more control on the spill of light. The grid makes the beam of light tighter with softer edge. Lets have some tests:
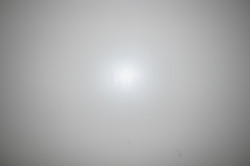
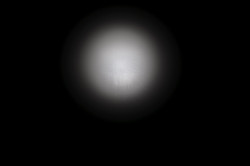
The first picture is a white wall lit by a bare flashgun directly mounted on the camera. The second picture is the same wall lit by the same flash mounted with the DIY grid spot pictured above. The wall lit by the bare flash receives the flash light on a wide surface. All the pictures is lit (with a different amount of light, but is still lit). The wall lit by the grid spotted flash only receives the flash light on a restricted area defined by a soft edged perfect disc. The structure of the grid in the cardboard is the cause of the shape of the highlight. Using a grid spot, I have a lot of control of where I want my light to go and where I want it not to go! I can use multiple grid spots lighting different areas of my picture to create the mood and effect I want. I'm controlling the light to create the picture I want, I'm not taking the picture that the light makes me take!
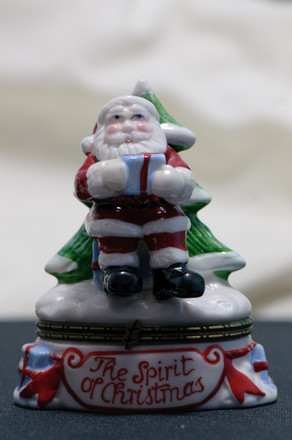
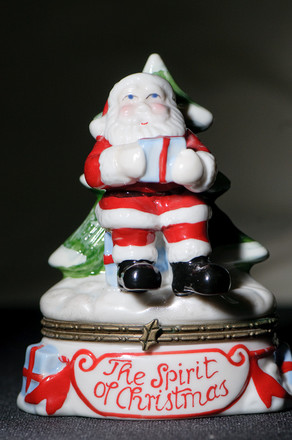
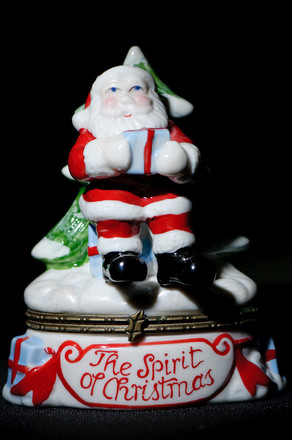
Let see how Santa is reacting to a DIY black straws grid spot:
Yay! No more distracting background. Even the foreground is less distracting now.
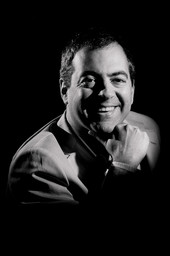
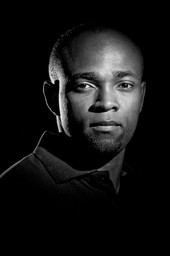
Here are some example of indoors portraits using both a DIY snoot and a DIY grid spot:
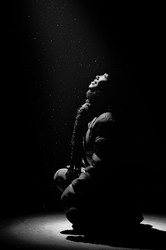
The first shot was done with DIY grid spot at the back of the subject and a DIY snoot at the front. You can notice the harsh and well defined edge from the light going thru a snoot. For the second shot I've reversed the snoot and grid spot, having the grid spot as key light made the transition from highlight to shadows becomes softer. Both pictures were taken in a normally lit room, the ambiance was killed by the use of a fast shutter speed and low ISO.
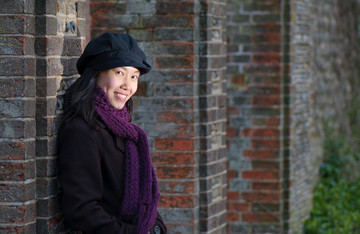
The following shot was taken from my post about CTO gel and what to shoot on a grey cloudy day:
For this shot of my wife in Worthin, near Brighton, I've used a DIY grid spot on a Nikon SB-600 Speedlight already mounted with a 1/4 CTO (Color Temperature Orange) gel to warm up the light. I first took a picture using the Aperture Priority mode with my Nikon 105mm Micro stabilized lens. Using a long lens allowed me to stay away from my wife at an angle that would only show the bridge legs and not what is on the other side. I then switched to Manual mode with the same aperture/shutter speed settings and under expose the background until it looks like what I wanted on the LCD. My flashgun was then triggered remotely using Nikon CLS (Creative Lighting System) in iTTL automatic mode. The camera calculates the right amount of light needed from the flash just enough to properly expose my wife leaving the background bright enough to see the details and appreciate the bricks but dark enough to not be distracting. The orange CTO gel warmed up my wife face, the grid spot gave me control on where my flash would light, in this case just the face and nothing else. Backing the flash a little made the beam wider so that the light now also lit her scarf and around her face casting a shadow on the brick wall behind her.
From all the accessories I have, the grid spot is among my favorites ones and mine is damn cheap: cardboard and black straws from a pub...
Tweet





Comments